This year, we got close. Real close. I brought the camera to the beach. The sun was shining. It was the perfect spot. The teenager was even willing! Ok, we didn't all have white shirts on, but we were ready for our close-up. Even had an extra, my nephew David, and he was all ready to take the picture. Note to self: When taking the camera somewhere, check the SD card. It wasn't there. We persevered, camera-less, by trying to take the photo with a cell phone. Lets just say, the image was so blurry, it could have been anyone. No faces were recognizable. Un-Usable.
So, I resorted to looking through the computer photo files, frantically searching for a picture of the 5 of us togther, looking fairly decent. Not only was there NONE of all five of us, I couldn't even find one of the kids together!
So, I spent half a day filing through fave photos we took through out the year. Went on Picnik.com (great--we signed up for premium, its only like 24.00 /year, its great. My daughter Adri discovered it. You could also do a collage on Picasa for free) I chose a saying I found on quotes.com: " It is Christmas is in the heart that puts Christmas in the Air" , then my favorite Christmastime sentiment (always in my card, every year) "May every joy of Christmas be yours." Here's what I came up with:
 | |||
| the card measures 6 x 6 I had it printed by a local digital printer on heavy stock |
 |
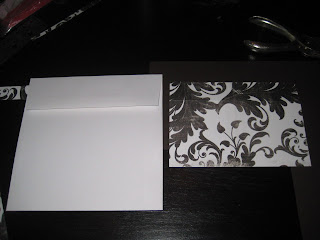
| My materials: envelopes, scrapbook paper, ruler, bone folder, glue stick |
The I lightly glued the back with a glue stick...
Inserted the paper carefully into the envelope opening, and pressed to secure, making sure the folded seams lined up:
There it is! It really added the character the whole thing needed.
So, if you procrastinated, there's still time! Gather up that decorative paper, start searching the photos you took this year and use them!
Make it a great day!
Ann


well done, we also procrastinated this year, was waiting until we got the tree up to take a picture of us in front of it, well it just got finished last night! i will probably steal this idea rather than try to figure out the timer on my camera so we can get a picture in front of the tree like id hoped!
ReplyDeleteLove the card! Happy holidays!
ReplyDelete